Today I will be sharing how to have a pixelated effect
with photos using Flash and calling it
with xml.
Step 1

a. Open flash and create new file.
b. create 2 new layers.
name top layer "action" and f9 to
open the actions panel and input the following meat!
import fl.transitions.*;
import fl.transitions.easing.*;
import fl.transitions.TransitionManager;
import flash.net.URLLoader;
import flash.net.URLRequest;
import flash.events.Event;
import flash.display.Loader;
import flash.display.MovieClip;
import flash.events.ProgressEvent;
import flash.events.MouseEvent;
import flash.display.Bitmap;
import flash.utils.Timer;
import flash.events.TimerEvent;
//
var count:Number = 0;
var tween_duration = 1;
var myTween:Tween;
var imgGroup:MovieClip = new MovieClip();
this.addChild(imgGroup);
this.addChild(loading);
loading.visible = false;
//
var total:Number = 0;
var pic:Number = 0;
var i:int;
var imgArray:Array = new Array();
var current_no:Number = 0;
var previous_no:Number = 0;
//image
var imgLoader:Loader;
//timer
var delay:Number = 5; //this changes image delay.
var timer:Timer;
//xml
var xml:XML;
var xmlList:XMLList;
var xmlLoader:URLLoader = new URLLoader();
var xmlPath:String = "xml/images.xml";
xmlLoader.load(new URLRequest(xmlPath));
xmlLoader.addEventListener(Event.COMPLETE, xmlLoaded);
function xmlLoaded(event:Event):void
{
xml = new XML(event.target.data);
xmlList = xml.children();
total = xmlList.length();
//trace(xmlList);
//trace(total);
for(i = 0; i < total; i++)
{
imgArray.push(
{
image: xmlList[i].image.toString()
}
);
}
loadImage();
//timer
timer = new Timer( 5 * 1000);
timer.addEventListener(TimerEvent.TIMER, autoSlide);
}
function loadImage():void
{
for(i = 0; i < total; i++)
{
imgLoader = new Loader();
imgLoader.load(new URLRequest(xmlList[i].image));
imgLoader.contentLoaderInfo.addEventListener(ProgressEvent.PROGRESS, loadingP);
imgLoader.contentLoaderInfo.addEventListener(Event.COMPLETE, imageLoaded);
}
}
function imageLoaded(event:Event):void
{
var imgBm:Bitmap = new Bitmap();
var mc:MovieClip = new MovieClip();
imgBm = Bitmap(event.target.content);
imgBm.smoothing = true;
mc.addChild(imgBm);
mc.name = "img_" + imgGroup.numChildren;
//trace("mc.name: "+mc.name)
mc.x = 0;
mc.y = 0;
if(imgGroup.numChildren > 0)
{
mc.alpha = 0;
}
imgGroup.addChild(mc);
loading.visible = false;
count = count + 1;
//trace(count);
if(count == total)
{
//trace("i am working")
timer.start();
}
}
function loadingP(event:ProgressEvent):void
{
//trace("Percent");
loading.visible = true;
var percent:Number = Math.round(event.bytesLoaded / event.bytesTotal * 100);
loading.loadText.text = percent + "%";
}
function autoSlide(event:TimerEvent):void
{
current_no++;
if(current_no >= total)
{
current_no = 0;
}
effect();
}
function effect():void
{
var prevMc:Object;
prevMc = imgGroup.getChildAt(previous_no);
var myTM:TransitionManager = new TransitionManager(prevMc as MovieClip);
myTM.startTransition({type:PixelDissolve, direction:Transition.OUT, duration:1, easing:None.easeOut, xSections:200, ySections:200});
myTween = new Tween(prevMc,"alpha",Regular.easeIn,1,0,1,true);
var nextMc:Object;
nextMc = imgGroup.getChildAt(current_no);
myTween = new Tween(nextMc,"alpha",Regular.easeIn,0,1,1,true);
previous_no = current_no;
}
Step 2

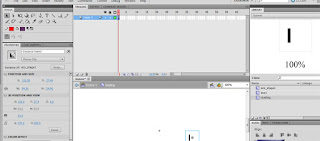
a. creat from rectangle tool a simple
black vertical bar and f8 it! converts to a movieClip.
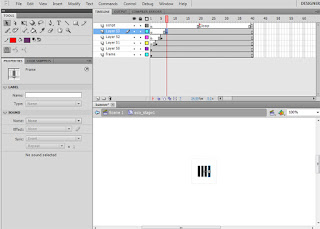
b. double click the new movie click and add

c. 6 new layers and name the top one
script and a label at key 20 and name
it loop and at key 40 open up the actions panel
and add the following script..
gotoAndPlay("loop");
d. Then on the rest of the layers on a sequence
of 3,5,7 key timelines and "eco1" bar movieClip
that you need to make from steo "a". and give it
motion tweens and 1, 10 and 20 keyframes.

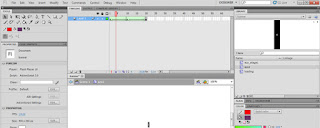
on frame 10 use transform tool and squeeze the bar
down to 2 pixels and open the color panel
and bring the alpha level down to 0%. keep
keyframe 20 the same as on. this will give it the
fade on transitioning.
e. ok then back to scene one with layer 1 with
the "eco_stage1" MC in it, double click on the
MC and add the loading text "100%" give it an
instance name of "loadText" and use Dynamic
Text option on the pull down menu.

f. whallaa! publish this baby to the same folder
with "img" folder and xml markup.
Now onward to the XML!
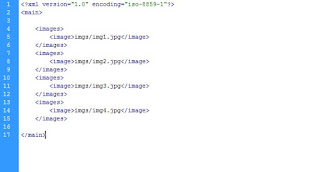
Open Dream Weaver and create a new xml document and add the following code and save as "images.xml"

click to enlarge
That's it!
View this in action at http://kalebdesigns.com/pixelEffect.htm
No comments:
Post a Comment