Text Masking in Flash
First, find any photo which you like to use for this lesson. I used one of my favorite singers Sade.
Step 2
Create a new flash document. Press Ctrl+J key on the keyboard (Document Properties) and set the dimensions of your document as the dimensions of photo. Select any color as background color. Set your Flash movie's frame rate to 10 and click ok.
Step 3
Call the current layer photo. Double-click on its default name (Layer 1) to change it. Press Enter once you have typed in the new name!
Step 4
Choose now File > Import > Import to stage (Ctrl+R) and import any photo into a flash stage.
Step 5
While the photo is still selected, go to the Align Panel (Ctrl+K) and do the following:
1. Make sure that the Align/Distribute to Stage button is turned on,
2. Click on the Align horizontal center button and
3. Click the Align vertical center button.
Step 6
Click now on frame 100 of layer photo and click F5 key.
Step 7
Create a new layer above the layer photo and name it mask text.
Step 8
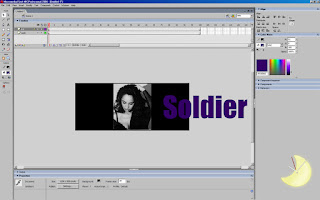
Select mask text layer, take the Text Tool (T), select a big, bold font (I chose Impact). Put the font’s size at something like 300. Then, write some text on the flash stage and place it on the position like it is shown on the picture below!
Step 9
While the text is still selected, hit F8 key (Convert to Symbol) to convert it into a Movie Clip Symbol.
Step 10
Click now on frame 55 and 100 and hit F6 key. Go back now on frame 55 and place the text on the position like it is shown on the picture below!

Step 11
Right-click anywhere on the gray area between frame 1 and 55 and frame 55 and 100 on the timeline and choose Create Motion Tween from the menu that appears. See the picture below.
Step 12
Select now mask text layer and convert it to a mask by right-clicking on the mask text layer and selecting Mask. See the picture below.

Whala Finished!
Finished Swf can be view at http://www.kalebdesigns.com/sade10.htm